.png)


In this blog post, we will build a React application through which we can draw interactive shapes with the help of the Canvas API.
We’ll also learn about Canvas HTML elements, the Canvas API, and drawing different shapes with mouse interactions.
Without further ado, let’s get started!
Prerequisites
To follow along with this blog post, I would highly recommend that you review the following topics:
The Canvas HTML Element and the Canvas API
<canvas> is an HTML element that helps you to draw shapes. You can draw shapes inside a canvas element using the Canvas API provided by your browser. This element acts as a container in which you can draw different shapes. To draw inside a canvas element, a context for the element is required. A context is an entity that we can draw shapes on. We can use getContext to get the CanvasRenderingContext2D that returns the 2-D context.
Let’s look at a simple React canvas component that draws a rectangle inside an element.
import { useEffect, useRef } from "react";

export const Rectangle = () => {
 const canvasRef = useRef<HTMLCanvasElement | null>(null);

  useEffect(() => {
 if (canvasRef.current) {
 const ctx = canvasRef.current.getContext("2d");
      ctx?.strokeRect(200, 200, 40, 50);
    }
  }, []);

 return (
 <canvas
      ref={canvasRef}
      width="400"
      height="350"
      style={{ border: "2px solid black" }}
    />
  );
};
Here is what the Rectangle component will render:
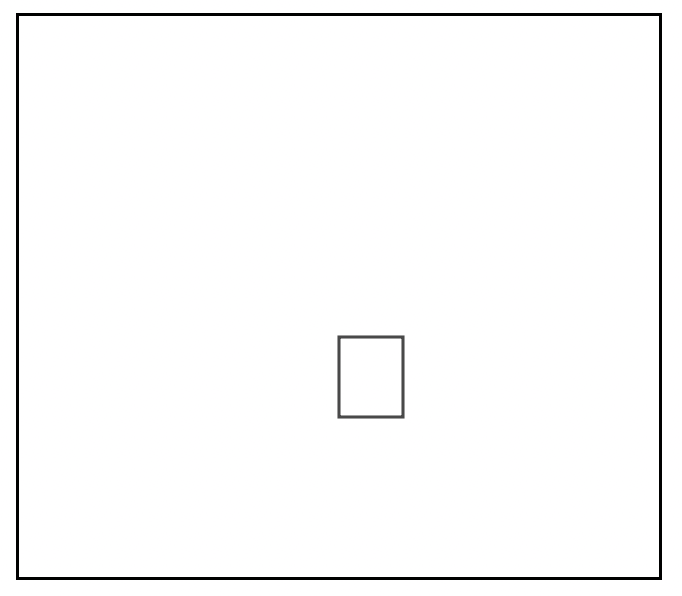
Let’s take a peek into the above Rectangle component:
- The
Rectanglecomponent returns acanvaselement whose width and height are set to400pxand300px, respectively. - We need to make sure that we pass a
refto thecanvaselement. This will help us to access the different properties of thecanvaselement. - Lastly, we want to draw inside the
canvaselement once the component is rendered. To do so, we’ll write a piece of code that gets thecanvaselement’s 2-D context usinggetContext("2d")and uses the above context to draw a rectangle with a functionstrokeRect.
Now, with this understanding, let’s dive into drawing some shapes.
Drawing a Rectangle on the Canvas
In this section, we’re going to talk about drawing a rectangle upon clicking the canvas, as in the gif below:

If we think about building an app like this in React or in JS, then we need to consider two important points: First, how we get the cursor’s x and y coordinates for drawing onto the canvas, and second, how we’re going to draw on the mouse click.
Let’s investigate these points further:
How would we get the cursor’s x and y coordinates so that we can draw it onto the canvas?
- In this scenario, we can simply add an event listener on the
mousemoveevent. - The handler we will attach will simply set the x and y coordinates to the values that are relative to the edges of the given element, like this:
const handleCursorMovement = (event) => {
 let rect = event.target.getBoundingClientRect();
 return {
      x: event.clientX - rect.left,
      y: event.clientY - rect.top
    };
};- The
x-coordinateis the difference between the viewport's x-coordinate and the distance of the current object from the left edge of the viewport. This will give us the x-coordinate inside the rectangle. In this case, the current object is what we’re hovering over. - Similarly, we have
ywhere it is the difference between the viewport’s y-coordinate and the distance of the current object from the top edge of the viewport. In this case, the current object is what we’re hovering over.
You can read more about clientX and getBoundingClientRect here and here. This is a really useful scenario, and it will be used in most of our examples.
So, let’s wrap this logic into a hook so that we can use it in any component we want.
Copy-paste the below code into a file named useMousePosition.tsx
import { useEffect, useState } from "react";

const useMousePosition = (
  global: boolean = false
): [{ x: number; y: number }, (event: MouseEvent) => void] => {
 const [mouseCoords, setMouseCoords] = useState<{
    x: number;
    y: number;
  }>({
    x: 0,
    y: 0
  });

 const handleCursorMovement = (event: MouseEvent): void => {
 //@ts-ignore
 let rect = event.target.getBoundingClientRect();
    setMouseCoords({
      x: event.clientX - rect.left,
      y: event.clientY - rect.top
    });
  };
  useEffect(() => {
 if (global) {
 window.addEventListener("mousemove", handleCursorMovement);

 return () => {
 window.removeEventListener("mousemove", handleCursorMovement);
      };
    }
  }, [global]);

 return [mouseCoords, handleCursorMovement];
};

export default useMousePosition;- This hook returns an array that consists of two things: the current cursor coordinates, and a function that handles the setting of these coordinates.
- This function also accepts a parameter called “global.” If set to
true, this parameter makes sure that a listener is attached to themousemoveevent over the entire window. - The default value of the
globalparameter is set to false.
How are we going to draw on the mouse click?
- In this scenario, we’re going to draw inside the
canvaswhenever the user clicks on thecanvas. - To do this, we are going to bind the
canvaselement with a function that executes itself on a click. It’s as simple as adding anonClickattribute to it.
To wrap up this scenario, place the following code inside a file named Square.tsx:
import { useRef } from "react";
import useMousePosition from "./hooks/useMousePosition";

export default function Sqaure() {
 const canvasRef = useRef<HTMLCanvasElement | null>(null);
 const [coords, handleCoords] = useMousePosition(true);

 return (
 <>
 <h1>Sqaure on click</h1>
 <canvas
        ref={canvasRef}
        width="400"
        height="350"
        style={{ border: "2px solid black" }}
        onClick={(e) => {
          handleCoords((e as unknown) as MouseEvent);
          if (canvasRef.current) {
            const ctx = canvasRef.current.getContext("2d");
            ctx?.strokeRect(coords.x, coords.y, 40, 50);
          }
        }}
      ></canvas>
 <button
        onClick={() => {
          if (canvasRef.current) {
            const ctx = canvasRef.current.getContext("2d");
            ctx?.clearRect(0, 0, 400, 350);
          }
        }}
      >
        CLEAR
 </button>
 </>
  );
}
The output will look something like below:
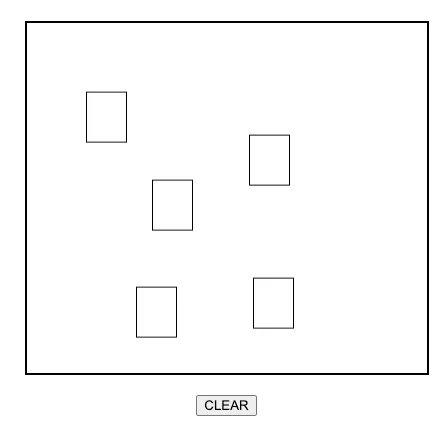
In this, we also make sure to provide a “clear” button so that the Canvas can be cleared.
As you can see from the above code, we have attached a function on the onClick attribute of the canvas:
<canvas
        ref={canvasRef}
        width="400"
        height="350"
        style={{ border: "2px solid black" }}
        onClick={(e) => {
          handleCoords((e as unknown) as MouseEvent);
 if (canvasRef.current) {
 const ctx = canvasRef.current.getContext("2d");
            ctx?.strokeRect(coords.x, coords.y, 40, 50);
          }
        }}
      ></canvas>
This function will do the following things:
- It will execute the
handleCoordsfunction that sets the current mouse position coordinates. - Then it gets the current canvas’s 2-D context.
- Finally, it draws a rectangle using the
strokeRectfunction via passing the x and y coordinates of the mouse pointer.
Let’s go ahead and look at what else we can draw with React canvas.
Animate Canvas Objects
In this section of the article, we’re going to talk about the interesting stuff: the animation of the objects present inside the canvas.
Things that we are going to do in this section are:
- Draw the shape on the canvas
- Move the shape on the canvas at a regular interval to get the animation effect
The animation that we are building here is a ball moving continuously in a horizontal direction. Here is a glimpse of it:
To draw a circle, we can use the below code:
export const drawCircle = (
  ctx: CanvasRenderingContext2D,
  circleDims: {
    radius: number;
    lineWidth: number;
    strokeStyle: string;
    colorFill?: string;
    startX: number;
    startY: number;
  },
  rectDims: { w: number; h: number } = { w: 400, h: 3500 }
) => {
 const {
    radius,
    strokeStyle,
    startX,
    startY,
    lineWidth,
    colorFill
  } = circleDims;
  ctx?.clearRect(0, 0, rectDims.w, rectDims.h);
  ctx.lineWidth = lineWidth;
  ctx.strokeStyle = strokeStyle;

  ctx?.beginPath();
  ctx?.arc(startX, startY, radius, 0, Math.PI * 2, true);
  ctx?.stroke();
 if (colorFill) {
    ctx.fillStyle = colorFill;
    ctx.fill();
  }
};
I have wrapped the logic of creating a circle in the function drawCircle. The logic of it is below:
ctx?.clearRect(0, 0, rectDims.w, rectDims.h);
  ctx.lineWidth = lineWidth;
  ctx.strokeStyle = strokeStyle;

  ctx?.beginPath();
  ctx?.arc(startX, startY, radius, 0, Math.PI * 2, true);
  ctx?.stroke();
 if (colorFill) {
    ctx.fillStyle = colorFill;
    ctx.fill();
  }
- First, we clear the canvas using the
clearRectfunction. - Next, we set the
lineWidthof the circumference of the circle/ball. - We also set the
strokeStylethat sets the color of the border. - Then, we start to create a new path using the
beginPathfunction. We make use of thearcmethod that helps draw circular arcs with the given x-coordinate, y-coordinate, radius, start and end angle. - Once the
arcis added as a sub-path, we can draw the arc onto the canvas with the given stroke style using thestrokefunction. - Finally, if the
colorFillis available, then it will fill the path with the availablefillStyle.
Next, we will make use of this function to create a component that animates the shape.
Create a file named Circle.tsx file and place the below code within:
import { useEffect, useRef, useState } from "react";
import { drawCircle } from "./utilities";

const Circle = () => {
 const canvasRef = useRef<HTMLCanvasElement | null>(null);
 const [startX, setStartX] = useState<number>(0);
  useEffect(() => {
 if (canvasRef?.current) {
 const ctx = canvasRef.current.getContext("2d");

      requestAnimationFrame(function ball() {
 //@ts-ignore
        drawCircle(ctx, {
          radius: 50,
          lineWidth: 3,
          strokeStyle: "#4F7CAC",
          colorFill: "#4F7CAC",
          startY: 150,
          startX
        });
        setStartX((prevStartX) => prevStartX + 5);
        ctx?.stroke();
 if (startX > 400) {
          setStartX(0);
        }
      });
    }
  }, [startX]);
 return (
    <>
      <h1>Moving Circle</h1>
      <canvas
        ref={canvasRef}
        width="400"
        height="350"
        style={{ border: "2px solid black" }}
      />
    </>
  );
};

export default Circle;
Let’s analyze this code a bit:
- The
Circlecomponent returns acanvaselement. This is similar to theSquarecomponent that we saw in the earlier section. - The aim of this animation is to move the circle continuously in the horizontal direction. So, in this case, we need to make sure we change the x-coordinate. For this, we created a new state variable called
startX. We’ll look later at how we updatestartXcontinuously. - Next, we have a
useEffect. ThisuseEffectgets the 2-D context of the canvas and then executes the functionrequestAnimationFrame. requestAnimationFrameis a function that tells the browser it needs to perform an animation. The provided function will be executed before the next repaint. In this case, we are going to pass a function,ball, that draws a new circle on every new x-coordinate with the help ofstartX.- We make use of the
setStartXupdate handler that updates the currentstartXby 5. - Lastly, we check if the
startXstate is crossing the right edge of the canvas. If yes, then we set the value to 0. This ensures that whenever the ball hits the right edge, it can start the animation again from the left edge.
Moving Shapes with Mouse Events
In this section, we’re going to talk about how we can make the shapes inside the canvas interact with mouse events.
The process that we are going to follow is very similar to what we had in the Square component. In the square component, we made use of the onClick attribute of the canvas element to draw a rectangle on the mouse click event. Similarly, we are going to make use of the onMouseMove attribute of the canvas element.
Create a file named TrackingBall.tsx and paste the below code:
import { useEffect, useRef } from "react";
import useMousePosition from "./hooks/useMousePosition";
import { drawCircle } from "./utilities";
const MouseBall = () => {
 const canvasRef = useRef<HTMLCanvasElement | null>(null);
 const [coords, handleCoords] = useMousePosition();

  useEffect(() => {
 if (canvasRef?.current) {
 const ctx = canvasRef.current.getContext("2d");

      requestAnimationFrame(function ball() {
 //@ts-ignore
        drawCircle(ctx, {
          radius: 50,
          lineWidth: 3,
          strokeStyle: "#4F7CAC",
          colorFill: "#4F7CAC",
          startY: coords.y,
          startX: coords.x
        });
      });
    }
  }, [coords.x, coords.y]);
 return (
 <>
 <h1>Tracking ball</h1>
 <canvas
        id="canvas2"
        ref={canvasRef}
        width="400"
        height="350"
        onMouseMove={(e) => {
          handleCoords((e as unknown) as MouseEvent);
        }}
        style={{ border: "2px solid black" }}
      ></canvas>
 </>
  );
};

export default MouseBall;
The MouseBall component is pretty similar to the Square component. The only change is that we are executing the handleCoords function inside the onMouseMove event. Also, we are making use of the requestAnimationFrame function to execute the ball handler on the change of coords.x and coords.y.
The final output will look like the below:
Summary
In this article, we talked about the following things:
- What is a
canvasHTML element? - How is a Canvas API used to draw inside the canvas?
- How a Canvas API works with the help of a simple example.
- Drawing rectangles and circle shapes with the Canvas API.
- Building a custom hook to track the position of the cursor.
- How the
requestAnimationFramefunction can be used. - Lastly, we also saw how we can make use of the mouse events to interact with shapes present inside the canvas.
So in this way, we can make use of the canvas HTML element, Canvas API, and React to draw different interactive shapes.


